First Video: How to cook kale

My very first attempt at creating a how-to video, so please be patient and forgiving!:) Cooking kale this way is so easy! And since many of you have asked for a lesson on how to cook kale in a frying pan, I knew I needed to create this video in order to share the kale love with all my foodie friends! I grew up with boiled and steamed kale, and hated every minute of the disgusting smell in our house. These are not your granny’s greens. No boiled greens in this house. Everyone I have ever made this for is surprised that kale can taste so good. The tricks are dry leaves (wash and dry) before throwing it in the pan, coconut oil (or oil of choice), salt, and garlic. Yep, that easy.  Watch this and leave any questions in the Comments section. I hope you try this amazingly simple way of preparing kale or ANY other greens (except lettuce) and open your heart to the possibility that you just might love kale too!

Encouraging Kale,

Organic Eater

As always, use as many organic ingredients as possible, especially since kale is on the Dirty Dozen list for pesticides. If you cannot find organic, be sure to wash them thoroughly with Vermont Soap’s Veggie cleaner. Good stuff!

Cantaloupe Icee: Vegan, Paleo, sugarfree, milk free

cantaloupeAfter starting a vegan cleanse today, and looking for this recipe for an hour, I decided I better add it to the recipes here at OE, so I don’t have to search for it again! And you’ll thank me. This is so super easy and yummy, if you love cantaloupe that is. Not sure it would work for any other melons except maybe honey dew, since its texture is similar. So, if you try another fruit, let us know (in the comments).

I am not going to give you amounts because you’re going to make this one according to your tastes. I will give you ingredients:

cantaloupe, cut to fit into blender, maybe start with half a cantaloupe for your first try

ice, about half as much as the cantaloupe

lime, I only use about 1/4 of a lime for a half a cantaloupe, but hubby likes to have more. Lime cannot be substituted and I’ve never made this without it. It’s like the secret key ingredient in this somehow. Just trust me.

mix in the blender until smooth, I use the “smoothie” setting on my Blendtec.

Here are some optional things you can add. My cantaloupe was not sweet enough, so I added a few drops of stevia to help it. If yours is sweet, try it first without the sweetener before you add anything. I have not tried it with honey or any other sweetener, so I do not know if it will change the flavor. You could add a milk of choice to make this more like a smoothie instead of an icee, but the flavor of the milk, will cover the cantaloupe and lime taste.  You can add a drop of vanilla, but it will take away from the tartness of the lime, so choose wisely. Again, hubby prefers the tart. Experiment with it to see what you like. You will want to serve this immediately because it’s just not pretty when the cantaloupe starts separating from the liquid. And that’s all there is to it. So easy. Enjoy!

Encouraging Health,

Organic Eater

Sugarfree Zevia Protein Muffins, with beets! (and other options)

As promised, here is a fun Zevia muffin or bread recipe from www.zevia.com! The original recipe on their website used Cola, but since I prefer Dr. Zevia, that’s what I used.  Adding the cola to the ingredients makes a fizzy “concoction” in your mixing bowl, that my 8 year old son thought was WONDERFUL! The recipe suggests opening the soda early, so it’s not so fizzy, but all that fizzy action was the fun part for us!:) We had a great time making this. Go to the link above for the ingredients and directions, and here are my suggestions and what I used:

I prefer to make grain-free recipes if possible, so I used almond meal that I buy at Trader Joes. Almond flour or another gluten free flour may have given it a slightly better texture, but they were still good with almond meal.

I did not have enough protein powder at the time, and they still turned out fine. I used a stevia-sweetened vanilla whey powder.

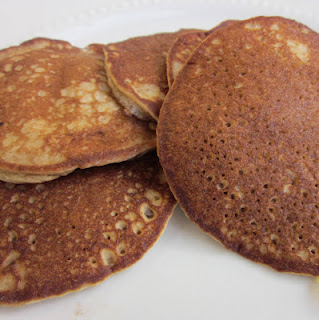
We made both bread and muffins, and I think the muffins turned out slightly better. Only, don’t use cheap paper baking cups like I did, because they stuck to the bread, which ashamedly, did NOT prevent us from eating every bite (yes, we scraped the paper to get every last bite, I admit it.)

BEST PART: I had an organic beet I wanted to use up, and since the recipe offered that as an ingredient option, I said “heck yeah, we’re usin that beet!”

Well, that’s what makes this the perfect Halloween baking experiment for all of you mad scientists out there! It turned the ingredients a beautiful dark red, (like blood, Halloween, get it?) and when we added the fizzy soda, it was a bubbling cauldron of bloody red goo (insert evil laugh here)! Look at all that awesomeness below!

Now, that bloody red color changes as it bakes (unfortunately), but it was fun while it lasted! So, here’s my full confession: while the beet made it super fun and a really cool color, it wasn’t sweet enough, so I would suggest using the applesauce or banana OR you could add frosting like I did in the picture below! (it was stevia sweetened cream cheese frosting). If you don’t have ingredients (or time) for frosting, you could always add honey on top instead. I especially love www.cloisturehoney.com ‘s whipped cinnamon honey! O MY Amazing!

My last bit of advice would be to make sure you chop/process your beets small enough, if that’s what you use for this. I left a few chunks, and it wasn’t my most favorite bite when I found them:) If you are a huge beet lover, then by all means, leave the beets chunky!

I loved the way this recipe offered so many options, so it has the potential to taste many different ways, depending on what you use. Chocolate chips and pecans would be a nice addition, if that works for your family. If you try this, I hope you have as much fun as we did making it! And please let me know how it turns out, since there are so many varieties possible! Happy Halloween! Enjoy!

Please go to this post  to enter the GiveAway for FREE Zevia! They generously offered TWO free 6packs to the winner, so you can drink some and cook with some! Check out the Zevia website for all kinds of recipes for no sugar foods and drinks.

Encouraging Health,

Organic Eater

Blender Pancakes

Taste is Trump.: GAPS Blender Pancakes.

I made these this morning, like many weekend mornings in the last few months. They are awesome. They’re my favorite grain free pancake recipe because it all goes in the blender, then I pour the batter from the blender. Couldn’t be easier. Seems like I’m all about sharing the “easy” recipes with you guys:) I guess that’s because it’s GOT to be easy for me to like it! And because one of my goals here at OE is to encourage everyone that cooking healthy food is not difficult!

I use her exact recipe, so go to the link and print it. Notice her disclaimer that a regular blender MAY not work on almonds. I used my Blendtec. Here are my other tips:

1. you don’t HAVE to soak your almonds. I have used soaked raw almonds and I have used raw almonds out of the bag. Didn’t seem to make a difference. Her blog should have more info as to why you do want to soak them for better nutrition,  if you plan ahead well enough. That’s not usually me.

2. keep the heat on medium,  the butter can scorch easily. Use grass-fed butter if you can, or organic. At the least, use real butter rather than a processed oil fake butter tub of gross. (hey Dana, why don’t you tell us what you really think of imitation butter!!??!) IF you need convincing on using grass-fed butter see this page. If you are vegan, well, I just remembered this recipe has yogurt in it, so I suppose you won’t be making this one anyway…. Oh! Wait! There is almond milk yogurt now. And you can use the coconut oil to fry them instead of butter. Oh, you’re all set!   Update: I forgot about the eggs since the recipe wasn’t right in front of me:).  Vegetarians would eat these, but vegans won’t. Sorry, I tried.

3. the batter will thicken as it sits. The first batch may be a bit thin but they will still taste great, don’t worry. After the batter gets thicker you may need to do this: after you pour a “blob” of batter onto the pan, take a spoon and spread it out a little. If you leave them too thick, they won’t cook properly.

4. I like to add some almond extract if I have it.

5. To make these an extra special treat, you can add chocolate chips, but don’t blend them. Add at the end. Same for blueberries or other fruit that is in season. We used blueberries today and they were heavenly.

6. Use REAL maple syrup, (grade B is more nutritious) not the fake stuff. I’m sure Aunt Jemima was a wonderful person, but she makes some crappy syrup (Hey Dana, why don’t you tell us what you really think about fake syrup?!!?). It makes no sense to go to the trouble of making these awesome pancakes and then top them with high fructose corn syrup. You simply defile these healthy pancakes by doing so. Do not defile the pancakes.

7. I also added  a few pecan pieces on top of my blueberry pancakes today. Brilliant.

8. this recipe makes enough for my hungry family of 4, with plenty of left overs, which we love.

9. In her recipe she also tells us that if you leave out the sweetener and vanilla, these can be used like pieces of “bread” to make pizzas or sandwiches. I can’t wait to try that!

REMINDER: chocolate chips and maple syrup are not on the Maximized Living “Advanced Plan”. They are a rare treat after weight goals have been attained, or if you’re a healthy kid who gets pancakes on Sundays like mine do! We eat healthy breakfasts all the other days, but Sundays are always a treat breakfast because it’s our favorite day of the week!

Enjoy! We surely did! In fact, hubs had all the leftovers for dinner tonight!:)

Encouraging Health,

Organic Eater